Tagging & Sorting.
BASE is for tagging, sorting and organizing your images privately on the cloud. Below are step by step instructions on how to get started using the interface.
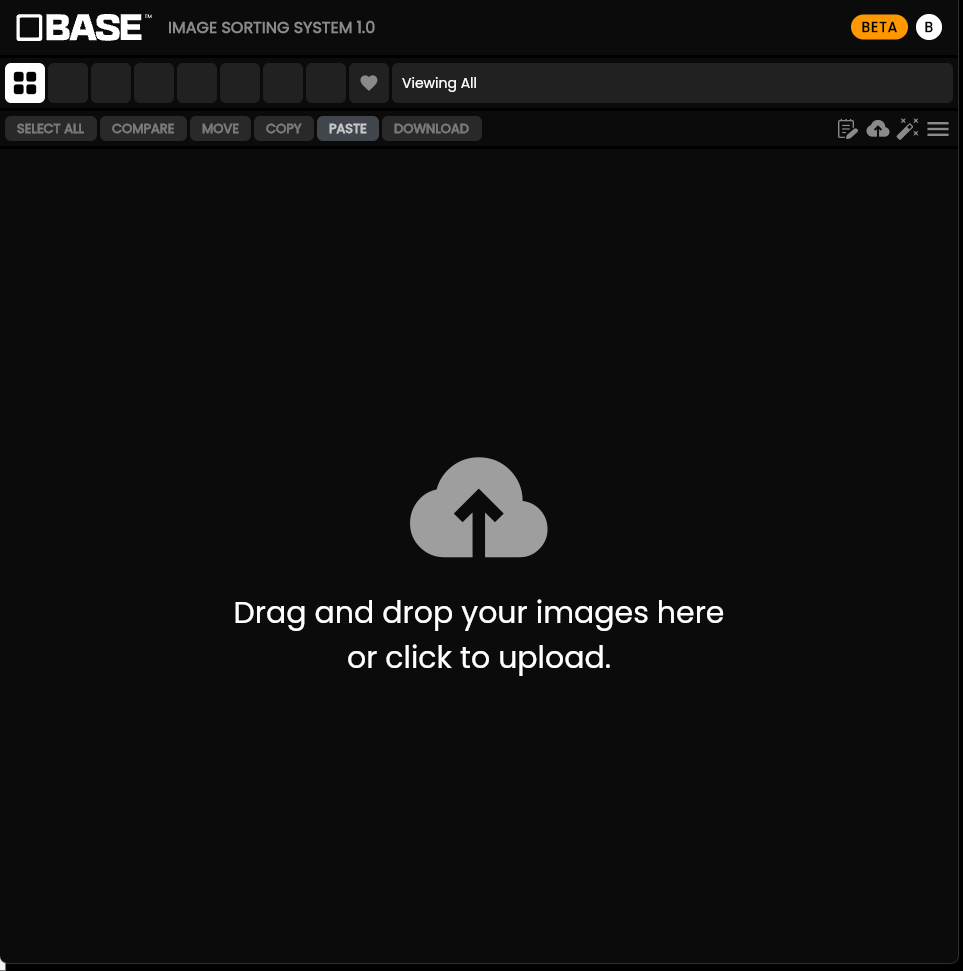
Step 1. Drag and drop your images or click on the cloud icon to upload.
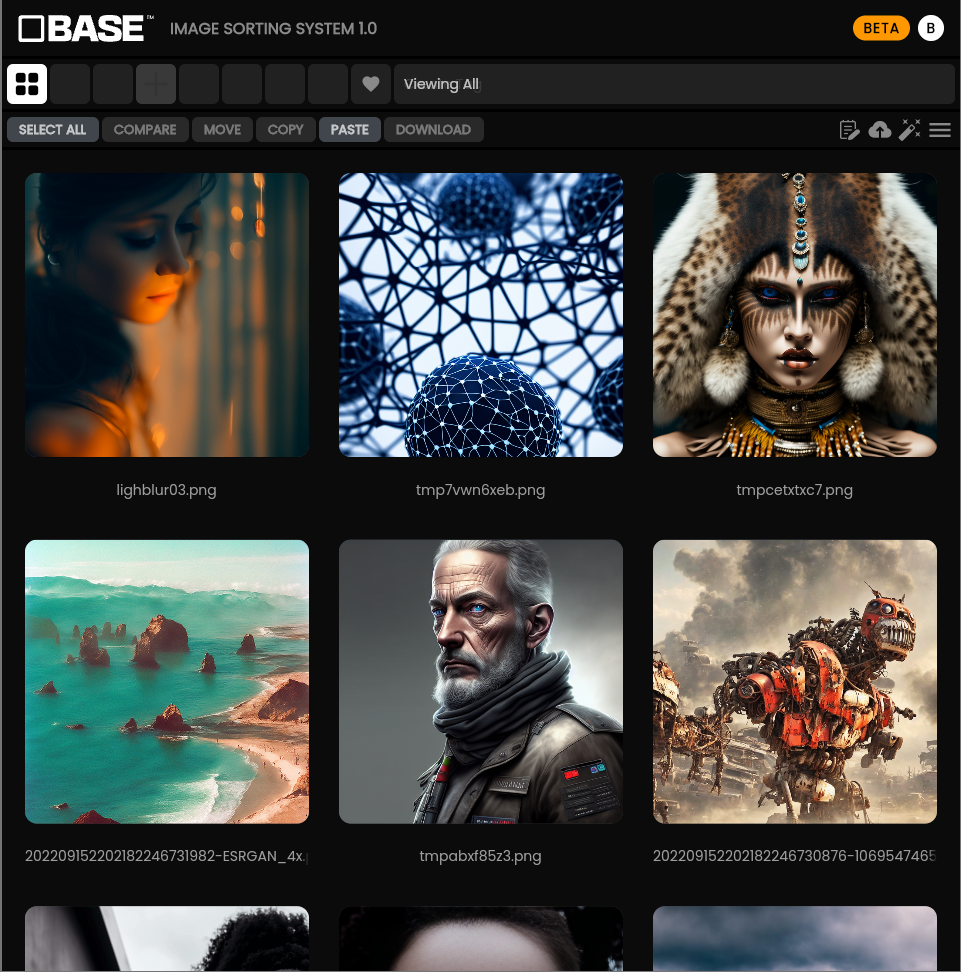
Once your images are uploaded they will display in the grid. You will see “viewing all” above in the status bar, which is the first icon in the top bar.

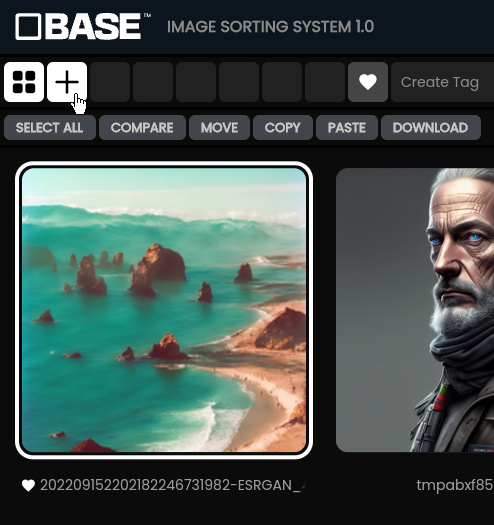
Step 2. Select images and then create a tag.
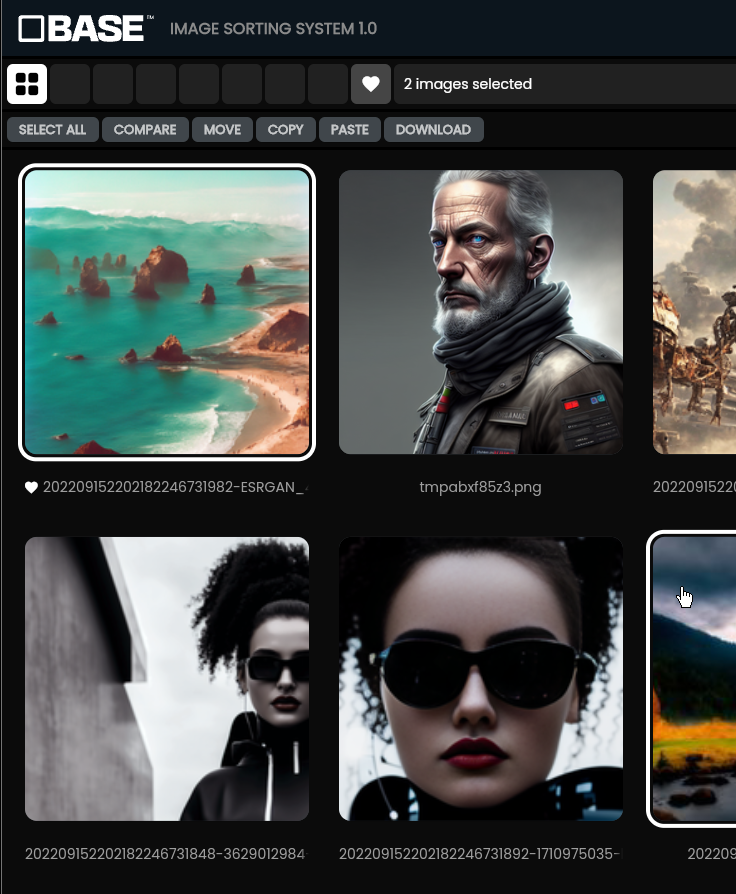
Now select an image. Hold the CTRL key while selecting another image to add to that selection. You can also use SHIFT key to select multiple. You can drag and drop the images onto one of the empty squares or click on it to create a new tag.
Select a color for your new tag and give it a title. Click “Randomize” for more random colors to choose from. Click on the Create button…
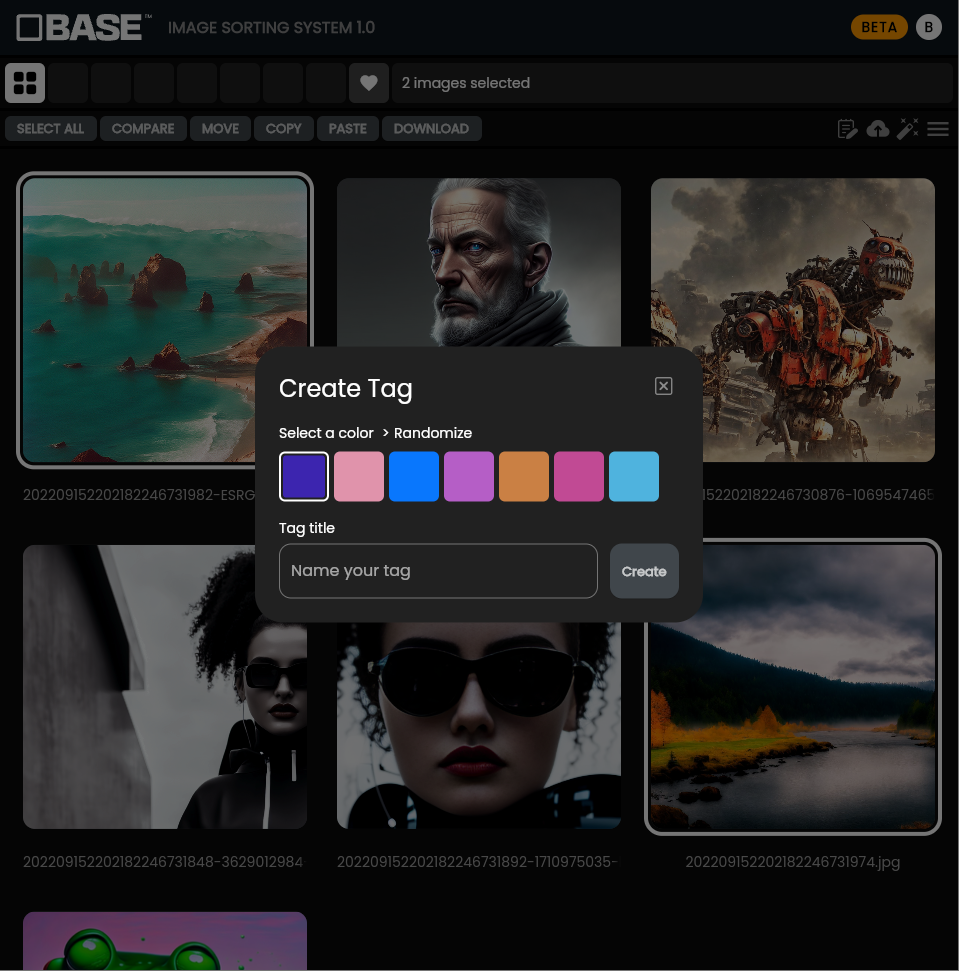

Once you are finished click on the Create button and you have created your first tag!
Step 3. Get sorted.
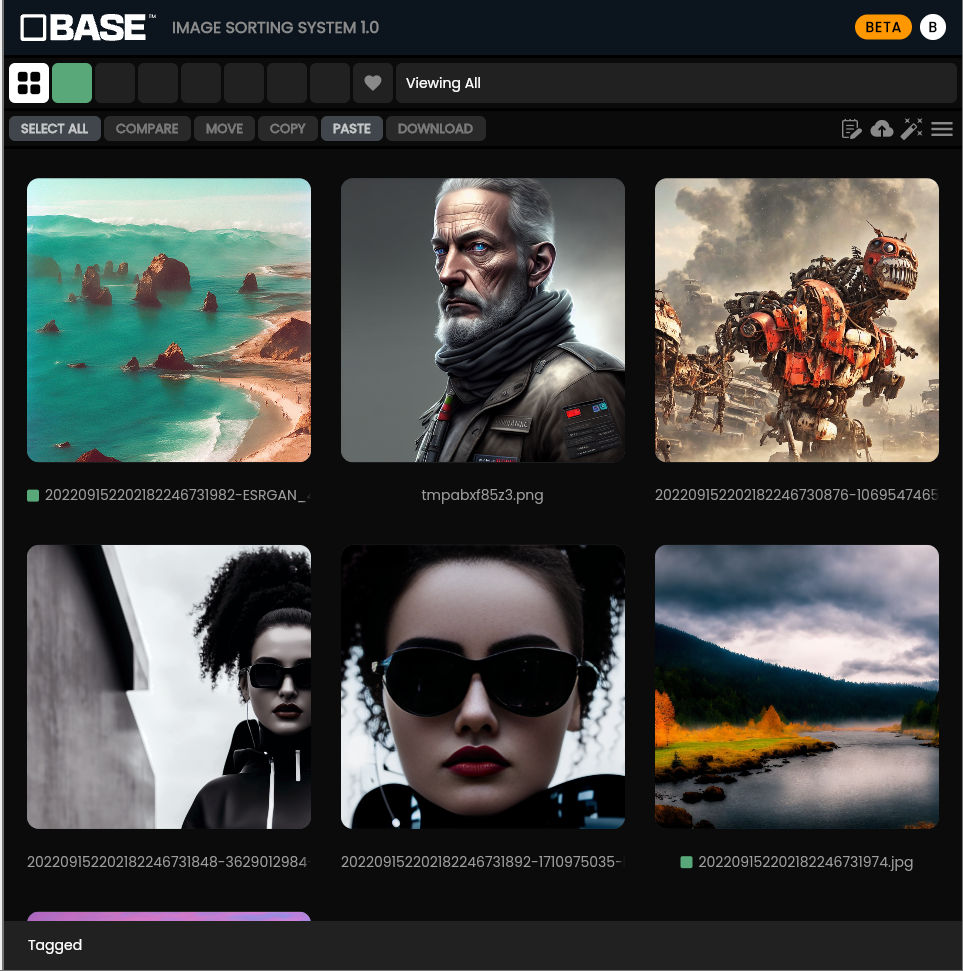
If you mouseover the tag you will see the tag title in the status bar. You will also notice a little square with the color you chose next to the image title.

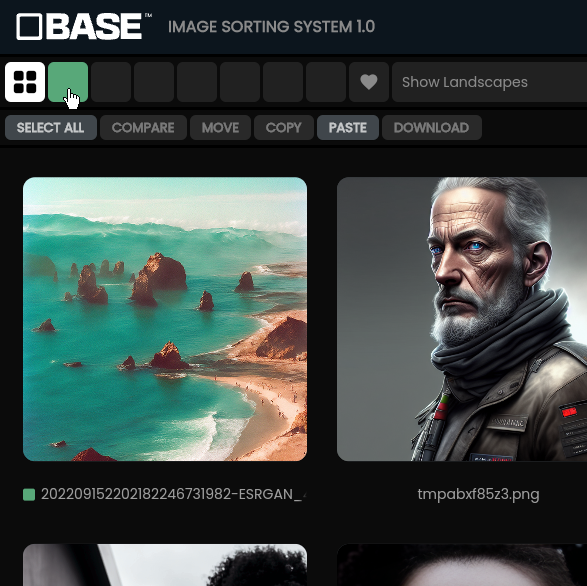
Clicking on the tag will refresh the grid and only show images with that tag. Clicking on the tag again will go back to viewing all.

If you upload another image and want to give it the same tag, select the image and then click on the color tag. And click the tag again to view them.
Tags are like toggle buttons and work like this :
– if an image is selected and you click on a tag, it will apply the tag to it.
– if nothing is selected and you click on a tag it will view images with that tag.
– if a tag is selected and you click on the tag again, you will go back to viewing all (the grid button).
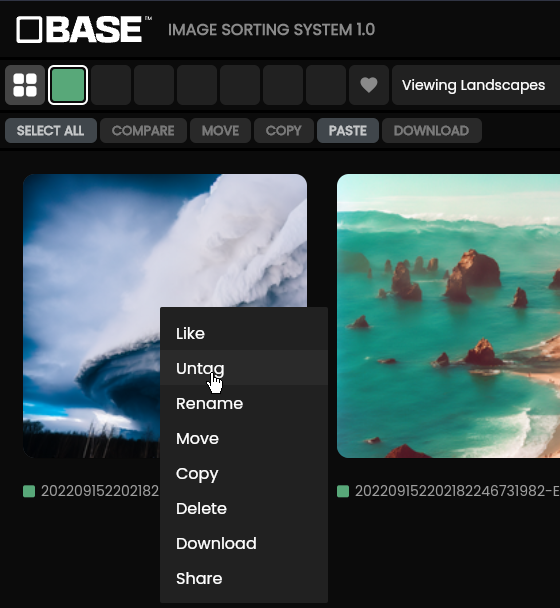
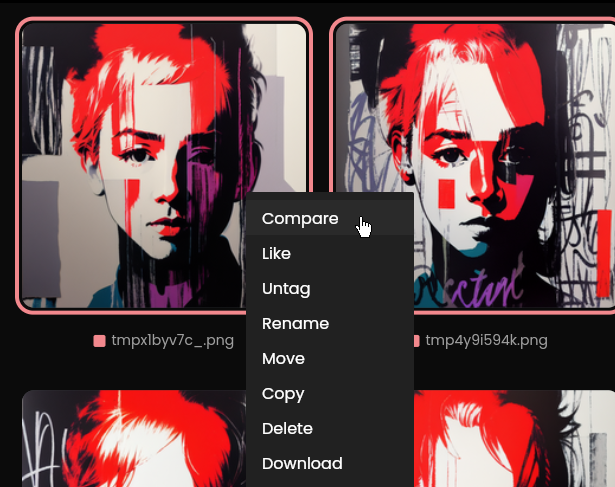
If you want to “untag” the image, right-click on the image and select Untag. This will remove the image from the tag. You can find the image again when viewing all.
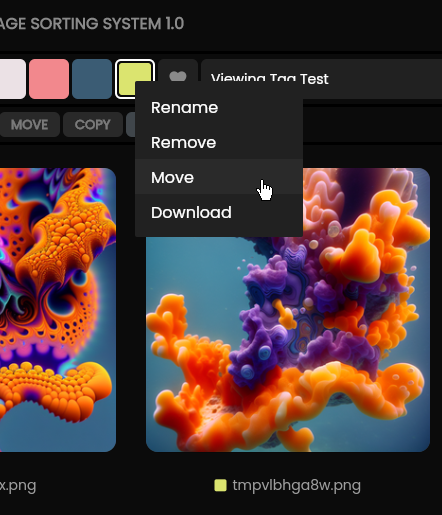
Clearing a Tag
Another way to move files is by right-clicking on a tag and select Move or Download and it will also prompt you to clear the tag. Now you have an empty tag that can be used on other images.
The Viewer
Double-click on an image to view it full screen. From there you can use the arrow keys on your keyboard to navigate or mouseover and click the left or right side of the screen.
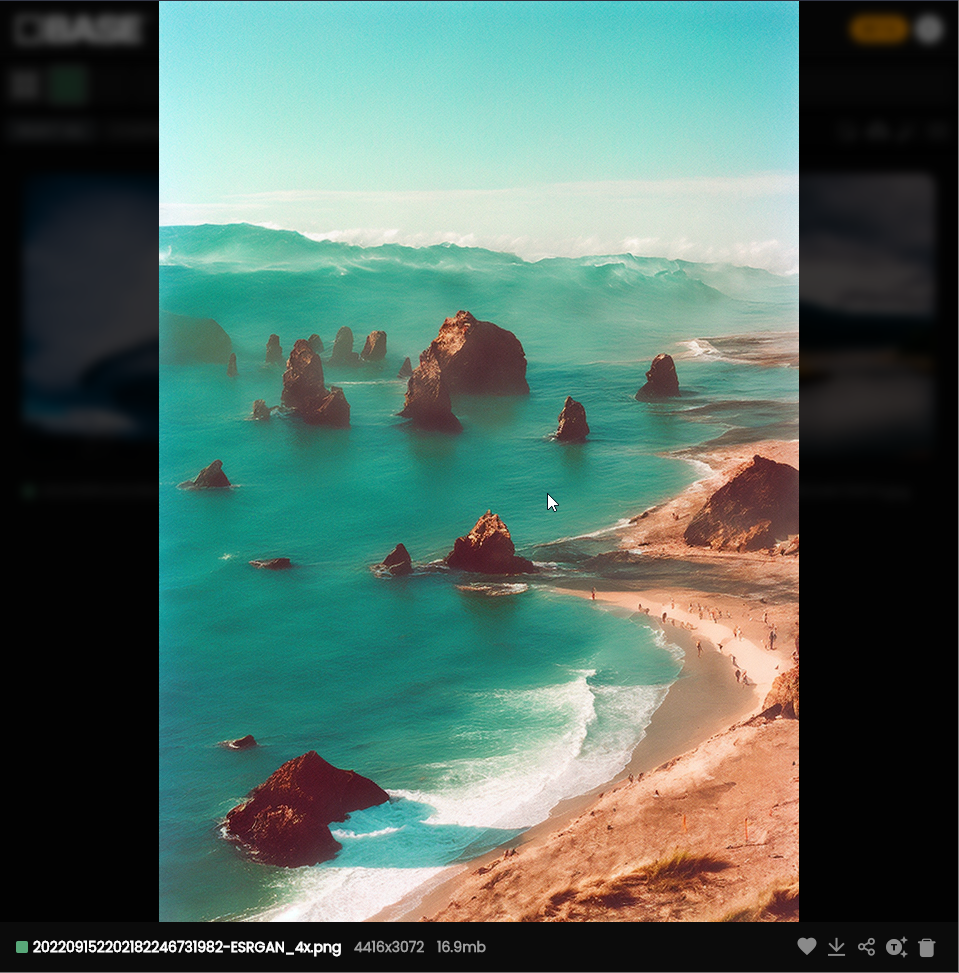
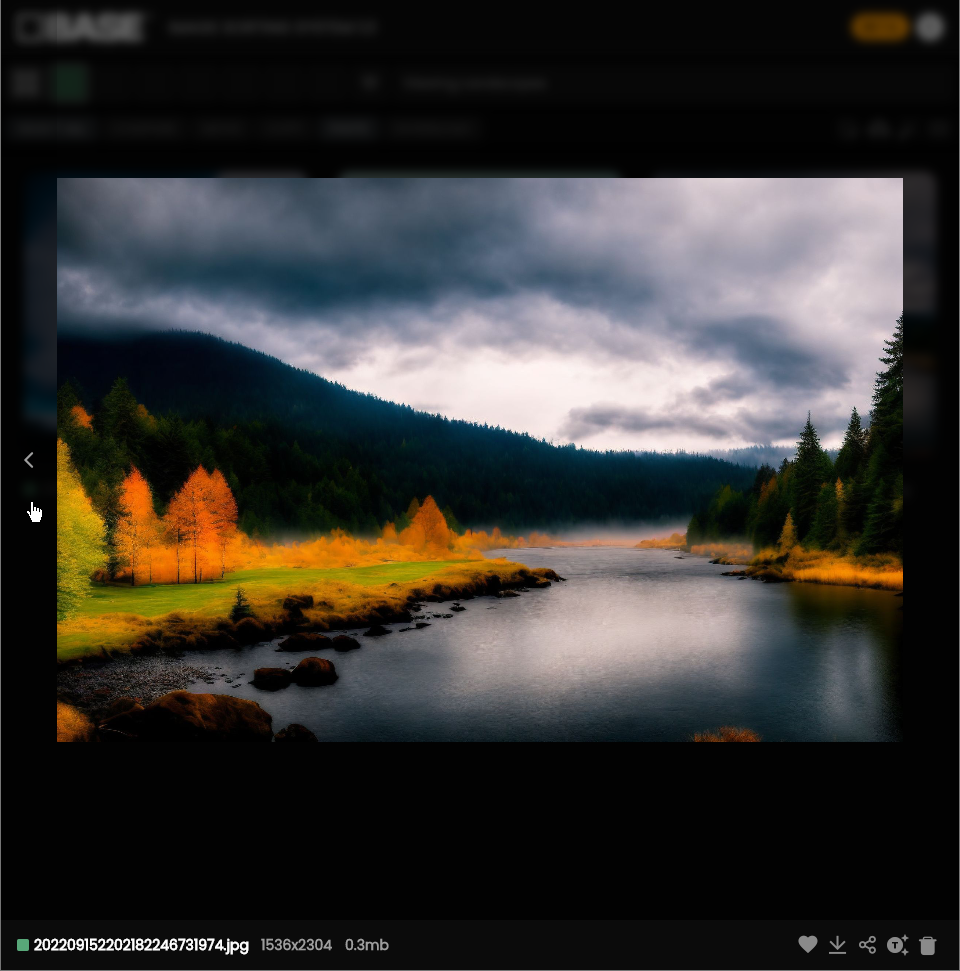
Double-click on an image to view it full screen.
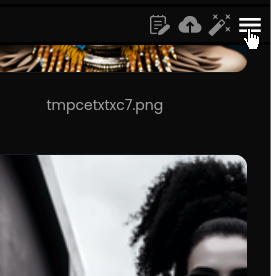
The bar at the bottom of the screen displays the tag, like, filename, aspect ratio, filesize and a few icons which we will go over now…

The Heart Icon
Clicking on the heart icon will LIKE the image. You can sort by likes by clicking on the heart button in the top bar.

Once you like an image the icon will change to a broken heart that you can click to unlike. You can also right-click on an image and select unlike there as well.


The Download Icon
This icon is pretty universal… click to download the image.

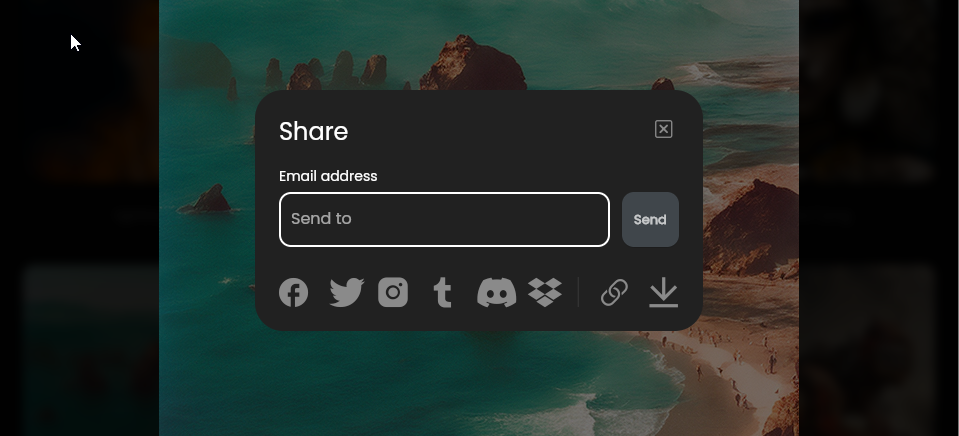
The Share Icon
Click this icon to share the image.

A share popup will allow you to send to an email address or post on social media. Click on the link icon to create a share link from BASE which can be posted anywhere.
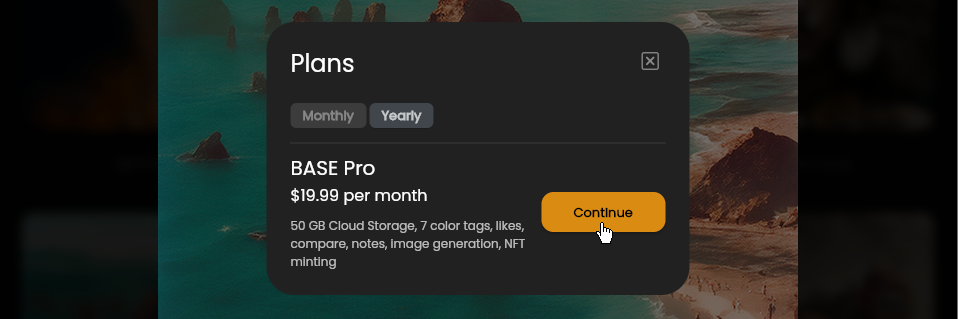
The Mint Icon
Click this icon to mint the image as an NFT. You need a BASE Pro account to use this feature.

The Trash Icon
Click this icon to send the image to the trash folder.

To view the trash folder. Click on the hamburger icon to view your files + folders. Then click on the trash icon.
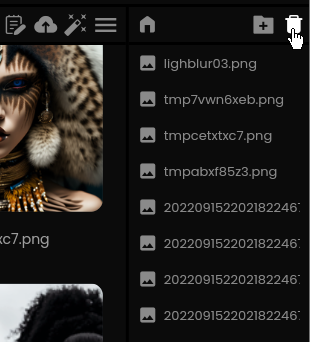
It will display Viewing Trash in the status bar.
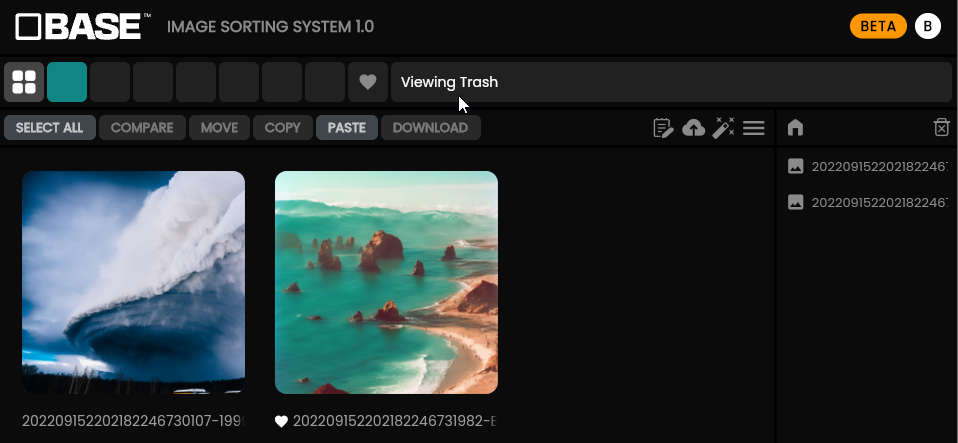
Click on the trash icon again and it will ask if you want to permanently delete trash contents. Select yes and your storage space will be instantly restored. You can also right-click on an image and select permanently delete.

Options Bar

There are some interesting options in this bar and will be where future features are added.
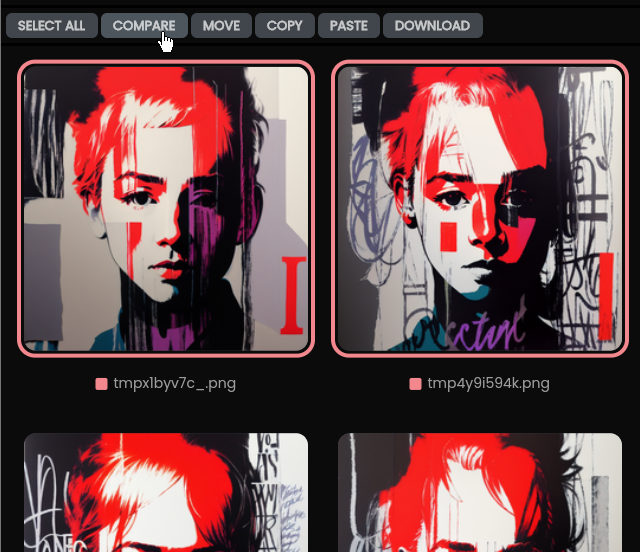
Compare
If you select two images this button will highlight. You can also right-click and select Compare for a side by side comparison viewer. Note, the compare feature only works in BASE Basic or Pro.
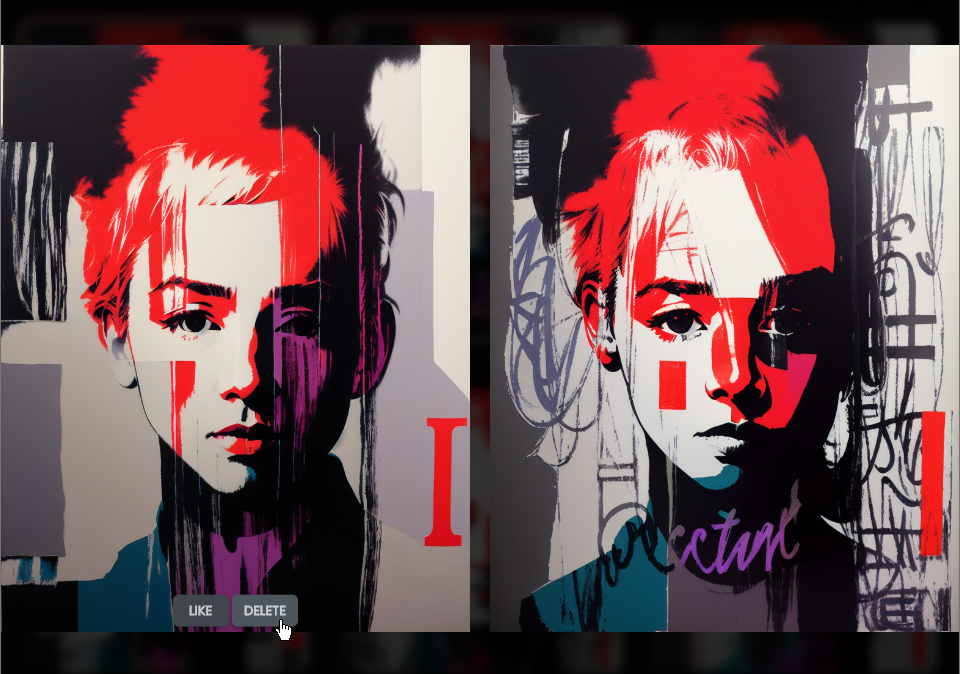
Now you can view both images side by side and then LIKE or DELETE one of them. Once you click on a button it will run the action and close Compare mode.
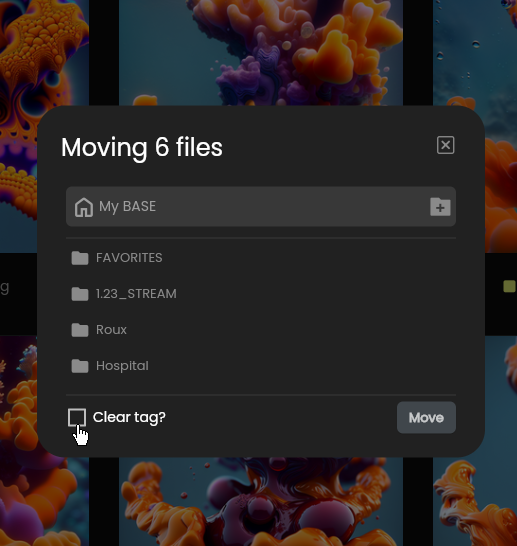
Move Files
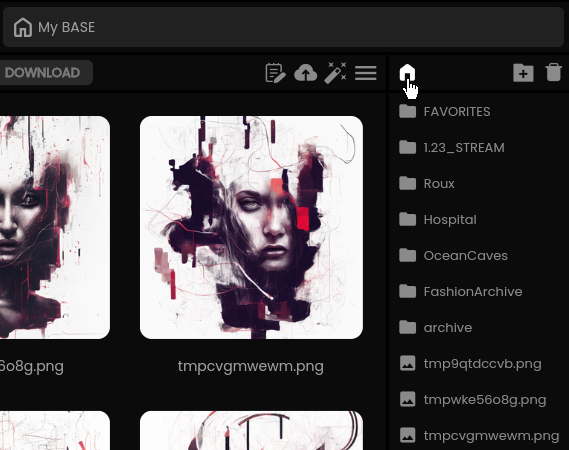
Move files when you are ready to archive. You can make a new folder and click on move button. To view them, select the hamburger icon which opens the file menu.
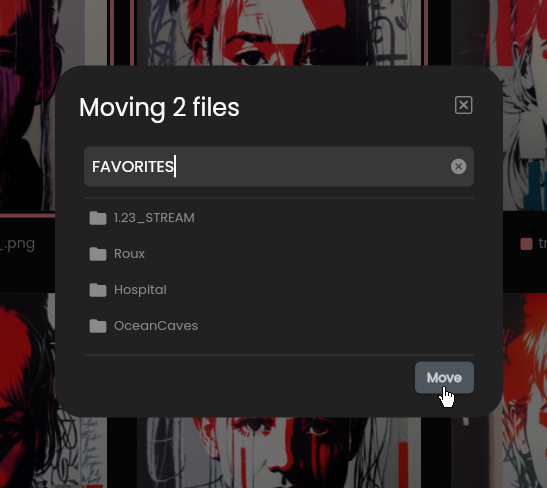

Once the file menu is open, click on the home icon to view “My BASE” root folder and any other folders you may have created, then double-click on the folder to view the files.
Moving tagged images
You can move tagged images by right-clicking on a tag and select Move or Download, which will prompt you to clear the tag. Now you have an empty tag that can be used on other images.
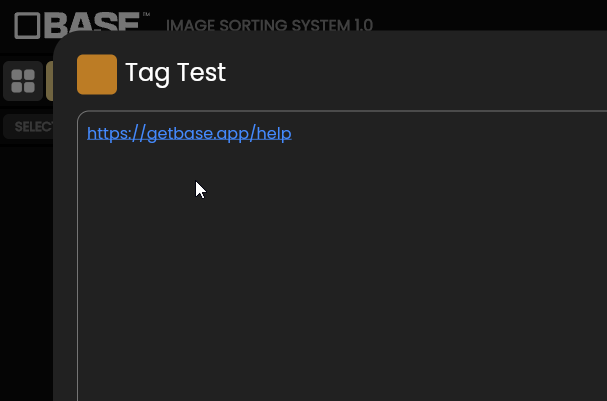
Add Notes
Click on the notepad icon to add notes to tags or view all mode. This feature is unlocked with a Basic or Pro account.

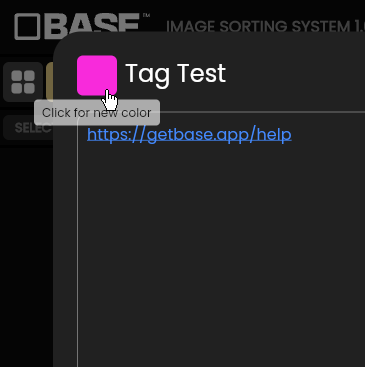
Once you click on the icon it will popup a simple notepad where you can enter notes for the tag.
Shortcut : Click the Tilde key on the keyboard to open it and ESC to close.
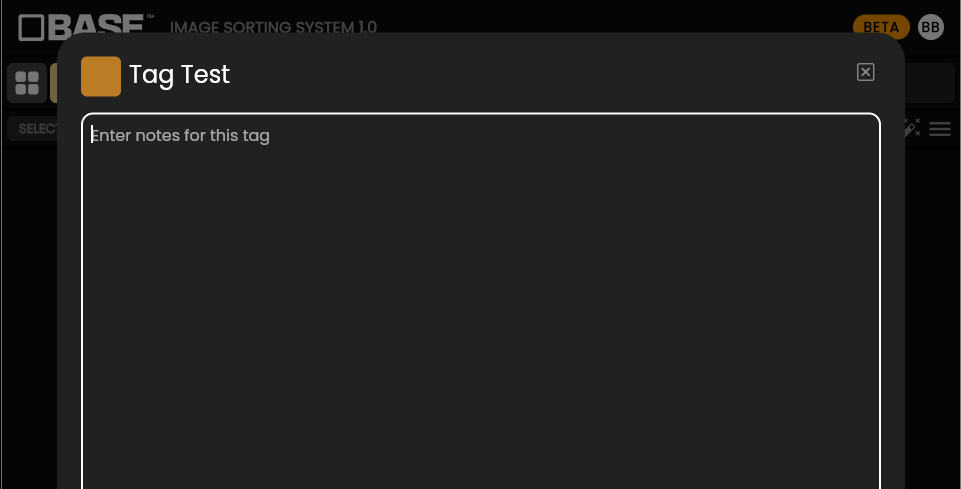
Anything you add will be saved automatically. Any link you add will automatically link when the text input is deselected. You can also change the tag color or title from here.
Upload
Click on the cloud icon to upload images to BASE. You can also drag and drop images right onto the grid to upload them.

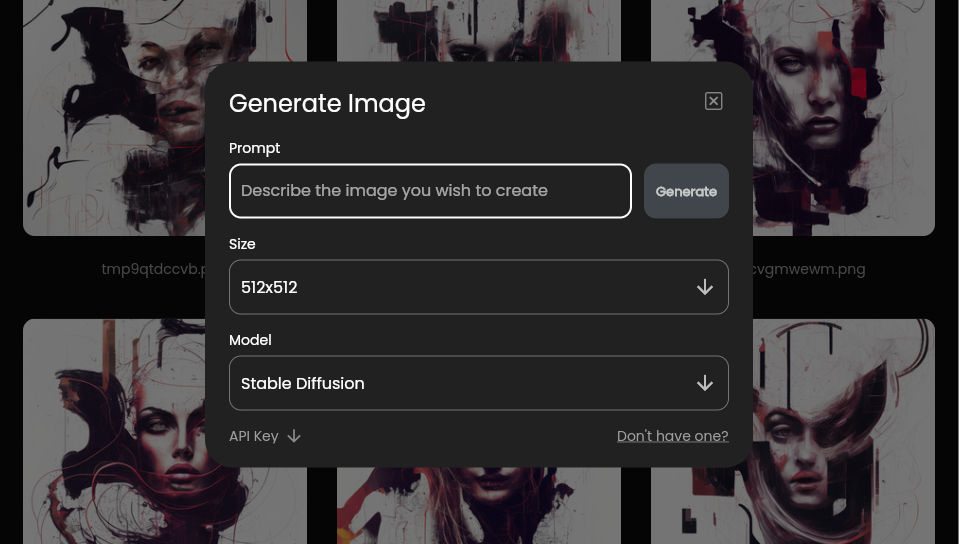
Generate Image
You can generate images with BASE Pro.

Clicking on the magic wand icon will popup the Generate Image options. You can use DALL·E 2 or DreamStudio.
Note : You have to have a Dalle-2 / DreamStudio account and enter the API key in order for this feature to work. Once you do you enter a prompt and click the generate button, the image will appear in the grid.